
I didnt feel as productive this week as most, but im not sure why. Looking back at the pictures from the week, I think a lot was done and maybe im just feeling the stress of the final weeks before launching.
I was able to get a coat of a two part epoxy primer on the dynel deck and later two coats of hull paint. A mixture of Kirby's cream yellow and white. This was rolled on. Afterwards, the deck looks just like canvas, feels like canvas, only with a small overlap down the center, which doesnt bother me too much.
Then I started focusing on the hull. I first made plugs using a hole saw and backing blocks. The backing blocks were screwed down from the inside and the bungs placed in the holes with a lot of G Flex epoxy. Since the hole saw uses a pre drill to make a guide hole, the hole in the center had to be bunged as well. As these were drying, I got distracted by the teak sole, and went at it pretty hard for the next two days. It came out really well and the bungs were put in on Saturday. I made the entire center of the sole, three planks wide, lift out for easy bilge access. Afterwards, I got out my old friend the long board and began fairing out the hull with 80 grit. When both sides of the topsides were done, I used a two part light body filling compound to fill all the screw heads in. The topsides are basically ready for a primer coat before I start to re-fill any cotton or seam compound. Look forward to some paint being put on next week.
Sunday, April 18, 2010
Saturday, April 17, 2010
Week 10
The dynel gets a coat of epoxy primer.

A view from the bow.

Then, two coats of paint. This is a 50/50 mix of Kirby's cream and white.

Rolling the paint aft.

All old thru-hulls are plugged with wood, epoxy, and backing blocks.

Here you can see the three backing blocks for the old thru-hulls.

The teak deck starts to get lain.

A bunch of tricky notches are cut into the planks.

One side is done.

And now complete. The entire center of the sole lifts up for bilge access.

As you can see here.

Bungs are put in

With hull paint on the way, I began by priming the rudder.

At the end of the day SAT, I had some fun cleaning up my bronze hardware in the sand blasting machine.

Now it all looks brand new!


Saturday, April 10, 2010
Week 9
To start the week off, I added a little extra strength to the aft bench area by adding four more supports connecting all the horizontals. I also tied it into the horn timber aft. With this done, it should be sturdy enough. The rest of the week was spent mostly on the deck, besides getting two coats of Bilgekote in the bilge area. Taping it off was easy, and sanding it was fine, but finding a place to kneel down while painting was tough on the knees. But the result is satisfying. When I finished, I decided that I should extend this area forward two frames and get a 3rd coat on overall. I also had to make an extra trip to Rhode Island to see my buddies at St. Angelo's Hardwoods to pick up the Teak for the cabin sole. I went down on Monday thinking I knew how much I needed. I milled out eight 3 inch wide strips at 6 1/2' only to realize I needed twice that. So on thursday, I went down again and picked up some more. Now all my teak is milled out and ready to cut to fit.
On the deck, I needed to fit the top layer of 3/8" okume plywood ontop of the first layer making sure to stagger the joints. I was lucky to find a full sheet of plywood in the shop that I could use, and it was just enough. I traced out where the deck beams where and as best I could any major fasteners and lathered up the plywood and fastened it down with #10 2" SS screws. The next day, I was able to fair out the new deck, on the outboard and inboard sides, finished fairing out the coaming lines and skreet fairing compound over the joint where the new deck meets the old and over the entire foredeck to fair out any lumps. All fasteners were filled with fairing compound also. After this went off, I used a longboard with 40grit then a random orbit sander with 80 to fair it out. Then I finished cutting out the space of old deck where the coaming ends just aft of the mast step with a jig saw and chisel. I added my 4inch wide oak supports inbetween the old deck beams as per usual and faired them to shape. A second coat of fairing compound was skreeted on any low spots I may have missed. This again was faired. With the deck fair, it was time to break out the dynel. I thought it was going to be very difficult to lay out the fabric without creasing it, but it proved to be pretty easy. The hard part was finding a place to walk along the boat in my socks to not scurry up any dust. I had marked out the centerline with a 1 inch overlap and taped the dynel down. Then, using epoxy with laminating resin, I began coating it out with a roller from the middle working out towards the ends. Everything went smoothly and by the end of the day I had the entire surface coated. Now, the deck is complete. It only lacks paint, which will be soon to follow.
week 9
Here I added some extra oak supports to the aft bench seat beams.

Laying out the 2nd layer of 3/8" okume plywood deck.

Detail of the fit at the transom.

The 2nd layer meeting the old deck.

Detail of the layout of screws.

Both sides glued and screwed down.

The screw holes were filled with micro balloons and epoxy as well as the entire foredeck for fairing.

First layer of fairing compound being sanded fair.

Last bit of the old deck is removed to where the coaming will end.

One more coat of fairing compound is skreeted over the foredeck.

I taped off the bilge area for painting.

Here are two coats of Bilgekote sanded inbetween with 120.

The dynel is brought onboard.

One side is rolled out and rough cut and taped to the center line.

Both sides are fit, cut to trim, and taped down.

A detail of the chain plates.

Wetting it out with laminating resin epoxy.

Another detail of the chain plate area.

There you have it. The deck is finished. Now all that is needed is a coat of primer and a couple coats of paint.

Saturday, April 3, 2010
Week 8
To finish up the work from last week, I began by roughly fairing in the new plank. This will take its true shape once I get out the random orbit sander and go over the entire hull. With that done, I did a few odd jobs until I really started getting to work on the new deck that will go down. I started building the inner bulkheads, which each have two vertical oak supports with horizontal planks of 1/2" okume plywood sealed in penetrating epoxy. I put an end cap of 1/8" oak that will get faired in later. These eventually will get painted. I also took the two pieces of oak that I glued together last week to get a nice 10" tall board and cut it to attach to the furthest forward sole beam. This gets fastened into the frames and sole beam and adds support to the cabin sole, support for the bulkhead that will go ontop of it, and also acts as a back splash for the step down into the cabin. This piece of oak really adds rigidity to an already rigid floor arraignment. I am happy with its outcome.
Dave helped me decide to add some structure to the coaming beams, which before were just standing alone with a single machine screw into the sheer clamp. In between each beam, I glued and screwed in a 4" wide 1" thick piece of oak. Once done on either side of the boat, I layed out the shape of the coaming once more and cut and faired it out. The shop had a bunch of beautiful 3/8" okume plywood that I used for the decking. There will be two layers, the first will butt up to the old deck, and the second layer will overlap the over deck via the 3/8" rabbit I cut into it with the router. This overlap is nearly 10" and will avoid making a hard spot where the two decks meet and add a lot of strength. By the middle of the day Saturday, I had both side decks epoxied down and fastened regularly with #10 1" SS screws. I got good squeeze out which proves a good seal. The new plywood was left big on all sides to that I can fair it to perfection later. I had some time left in the day, so I decided to install the aft seat beam supports. The furthest one forward is made of 2" tall and 1" thick white oak and the next two aft are 1 1/2" tall 1" thick. There are three total, and they are glued down with G-Flex and fastened with #12 2" SS screws. I feel good about my progress and next week should prove to see a lot of big hurdles overcome, specifically the coaming. I head down to Tiverton, RI on monday to pick up teak for the cabin sole.
Week 8 Photos
I started the week off by fairing, roughly, the new plank.

The a straight line was cut along this deck beam where the old deck will meet the new deck.

The inner bulk heads begin to go in.

All the pieces cut, fit, and sealed with two coats of penetrating epoxy

Port side installed with trim cap.

This piece of oak was laminated to get the height and installed. This bulks up the sole beams and is where the big bulkhead will land. It also acts as a backing board to the step down into the cabin.

I decided to strengthen the coaming beams with 4" wide 1" thick oak supports in between each beam.

After both sides were installed, I faired out the shape of the coaming.

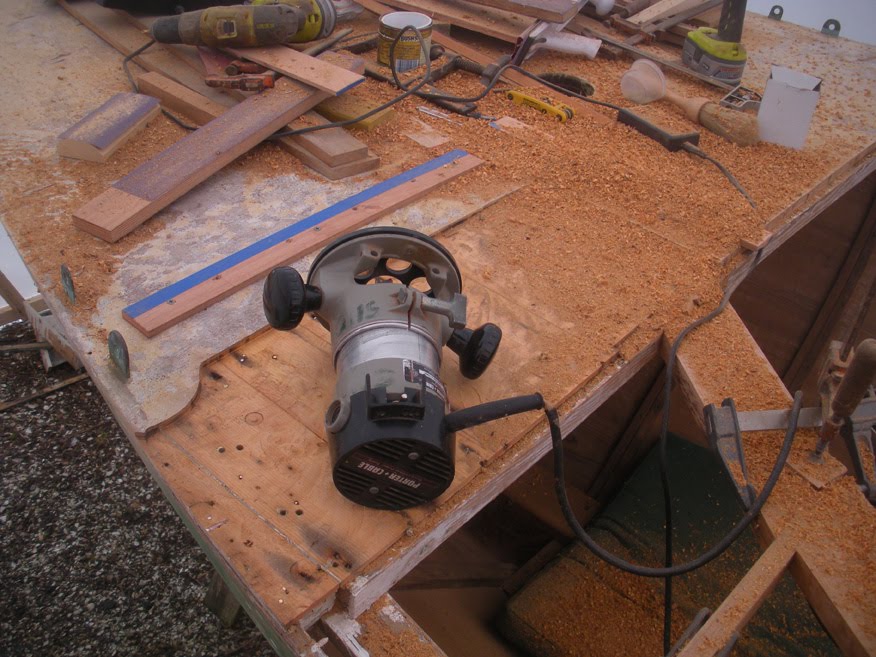
I used a router and jig to rabbit out the old deck 3/8" to give a nice overlap scarph where the top layer of plywood will go.
Here is the first layer of 3/8" okume plywood butted up to the old deck.

View looking aft. Port side is epoxied on and fastened with 1" SS screws.

Both sides of the deck are on! Second layer will go on tomorrow.

Here I am fitting the beams that support the aft bench seat.

First beam is in.

Followed by two more. These are glued onto the frames using G-Flex and #12 2" SS fasteners.

Saturday, March 27, 2010
Week 7
As the weather fluctuates, my contempt for the winter is growing. We had snow yesterday and ice in the puddles this morning! Anyway, a lot of work was completed this week, starting with the new carlin and clamp on the STBD side. Last week, I finished up by riveting the clamp on, then fastening the new carlin to that. Now, the STBD side is done, with much less destruction to the old frames then was seen on the Port Side. No fasteners seemed to lose their grip, and no new frames are needed on the STBD side. After the carlin was fastened to the clamp and cut to length, I continued on this project by shaping and installing the coaming band (as I call it). The piece of oak that is fastened to the carlin that extends the bend of the coaming inwards and forwards. Then, there are three coaming beams that extend to further give the shape inwards for the coaming. With these pieces in, on either side of the boat, I am able to use a long batten to find the final ending point of the coaming just aft of the mast step. This I marked out with magic marker and will eventually cut out with a jig saw.
But, before that, I need to take care of the most pressing issue found with the boat this whole project. Two loose frames on the port side farthest aft and planks up to the two forward more frames loosing their grip. I knew I needed to replace some frames, and decided that the last two would need replacing as well as the sistered frames on the next two stations forward. I started by removing all the fasteners I could, but in most cases, I needed to chip away the old frames and push them out from the inside (as I found I needed to do with the old frame heels already repaired). When this was done, to my surprise, the old repaired plank after fell off the boat. The last fasteners going into the transom let go. I had to remove all the cotton and putty in the seams of the planks in question, so that they would more easily be forced back to their correct fairness and shape. Then, I used the old plank that fell off, so shape a new one out of some Atlantic White Cedar that the boatyard had lying around. With this fit, I devised a way, with the guidance of Dave Kells and Brad Pease, of using strapping bolted to the boat and clamped at the top and a series of wedges to hold the planks in place while new frames were pushed against them from the inside and bent in. With this all in place, new frames were ready for milling.
Talking to Brad, I learned that the White Oak I bought from VT was kiln dried and would be no good for bending. Luckily, there is plenty of air dried White Oak at the yard, and I was able to get all I needed out of a piece they had inside. Four new frames were cut to length, and left wider then what was there to remove the gap that the previous boat builder left when installing the sisters and keeping the same screw holes. I dug out the old steam box, hooked up the propane tank and got the fire going this afternoon. After an hour in the steam, Drew Dunne came over and gave me a hand. He grabbed the frame out of the steam box, handed it to me in the boat, I bent it and wrestled it into position, and he fastened it in. The first frame gave us the most trouble, but after we learned a good technique, we managed to get them all in and secured. 80 new silicone bronze fasteners were put in today.
As a small side project between these big jobs this week, I was able to cut, fit, and install 4 vertical supports from White Oak for the inner bulkheads. Thanks for checking in. A little over a month left before Pompano is expected to be wet, regardless of any finish work that remains!
Week 7 Photos
Not sure how Herreshoff MGF co. made the bend in this sheer clamp.

To make it easier, I used the bend as my scarph joint for the new clamp.

One dutchment on the STBD side.

Another good fit.

Here is the clamp with all the rivets in. Peening these over didnt affect the fasteners as badly as it did on the Port side.

Shaping the carlin to match the clamp on the Port side.

Cutting the curve of the coaming band on the band saw.

The coaming band installed with fasteners and GFlex epoxy on Port.

STBD side was also installed. As well as the three coaming beams you can see before the deck starts. Notice here that I am using a batten to mark out where the coaming will go forward.

Here it is laid out on the old deck.

The last pieces of Pompano's former house burn to provide warmth on a snowy day at the end of March.

Two vertical supports of white oak are installed and glued in on either side for the inner bulkheads.

A frame pops off on Port side from peening the rivets. More loose frames were noticed after this, but action is taken...

First, the cotton in the seams of the problem area is removed.

An old repair, the plank you see missing, is removed and a new one will be made.

The space seen from the inside.

The new plank taking shape from Atlantic White Cedar.

All the planks are wedged together to take their original "shape" and to allow new steam bent frames to be pushed against the planking.

From the inside. Notice that the aftermost two frames are gone, as well as the sisters for the next two frames moving forward. Thats four new frames total.

The new frames take shape from some air dried white oak at the boatyard.

The steam box is set up and the fire lit.

Drew Dunne comes to help on a saturday, fastening the new frames as I bend them in.

Contemplating the job. Some frames took a couple tries.

Eventually, after a lot of sweat, we got them all in and 80 new silicone bronze fasteners in place.

Subscribe to:
Posts (Atom)
